Eat!

Eating is a necessity. However, we choose what to eat. The choices we make reveal a great deal about us. The food you eat can tell quite a bit about your heritage, your family, your fears, your sense of adventure, your attitude toward yourself and others, and a myriad of other personal tidbits to anyone paying attention. Everything about eating is a glimpse into your soul.

I hope to reveal a little bit about myself to you through my food. I enjoy cooking. I enjoy eating. I find pleasure in bringing pleasure to others. I hope that by sharing my recipes I bring you a little bit of joy.

Cook my food. Feed it to the people you love.

Showing posts with label New Year. Show all posts

Sunday, December 23, 2018

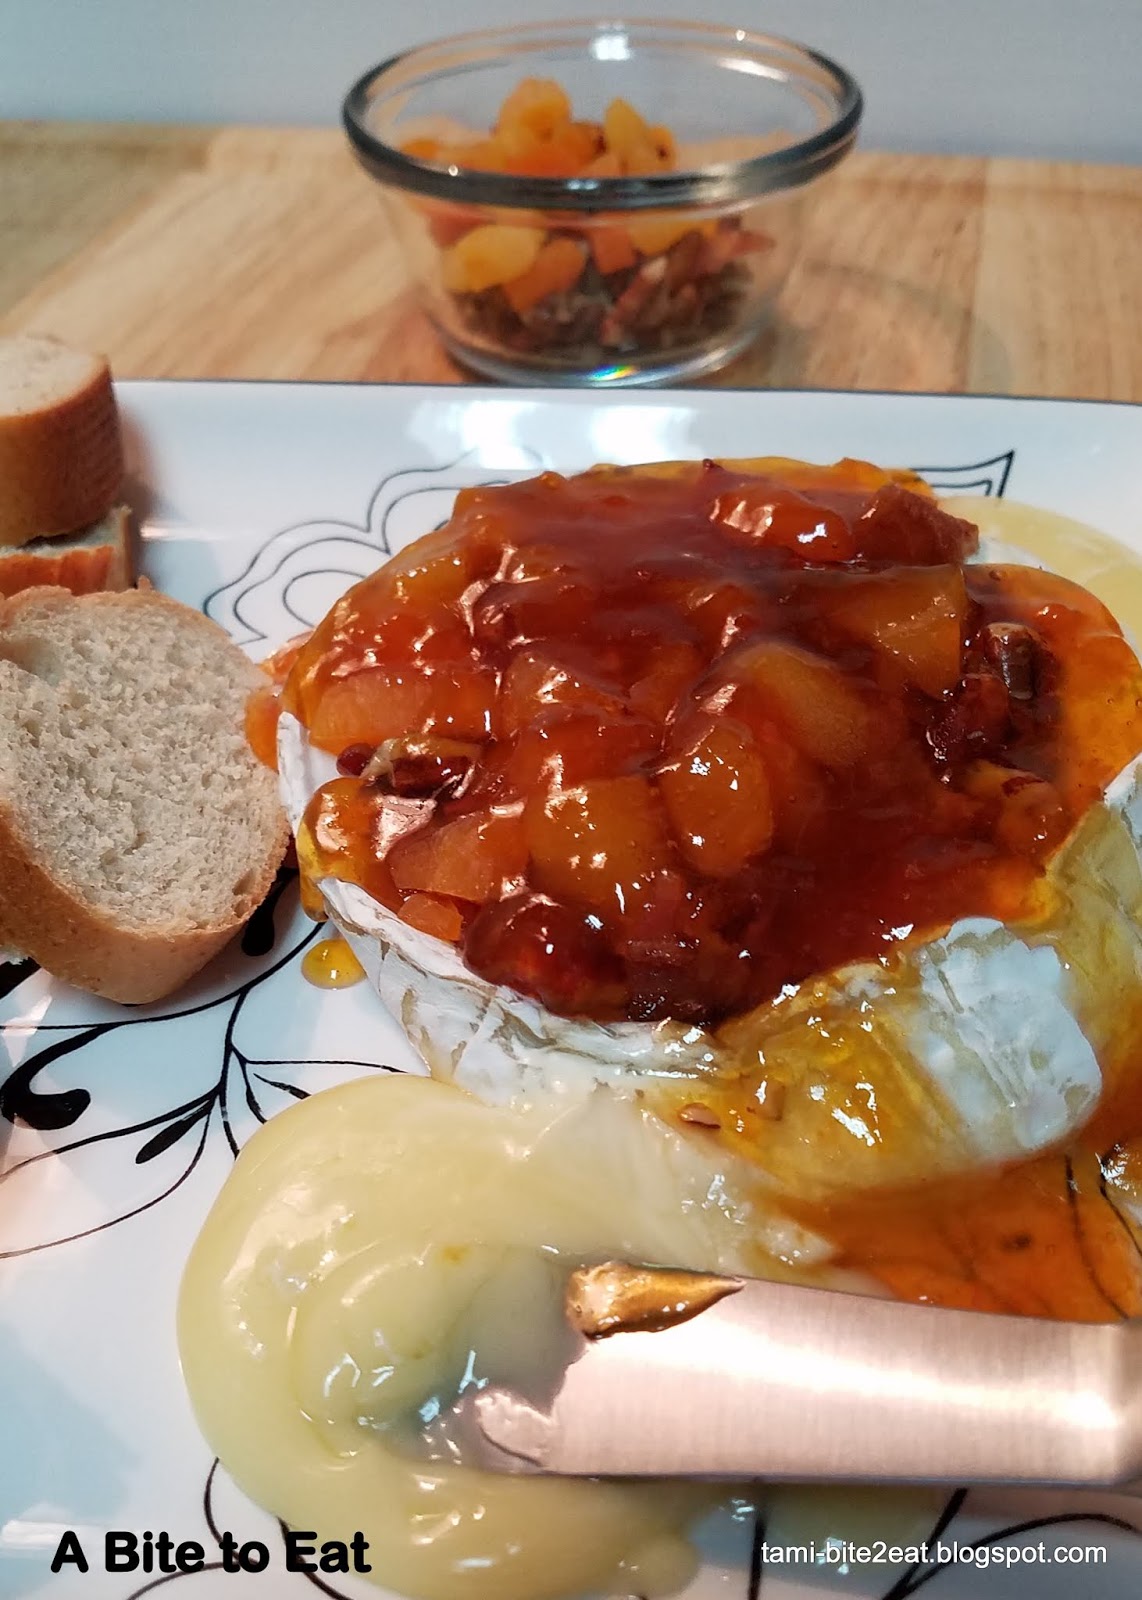
Baked Brie with Apricots

Baked Brie with Apricots

Are you having people over for Christmas Eve or Christmas Day? Do you need a last-minute appetizer or snack? Baked Brie with Apricots is delicious, truly beautiful and so, so very easy.

I used bacon crumbles that are available in the salad dressing aisle, just to speed things up. However, when I am cooking bacon, I cook 2 extra slices. I then wrap those slices tightly in aluminum foil and place them in a Ziploc freezer bag. I use that bacon for recipes as needed.

Servings: 8 ounces of brie 10-12 bites (make two)
Hardware: A cutting board and knives, a small skillet, a microwave safe bowl (I used a glass measuring cup for easy pouring), a silicone spatula, a baking sheet, parchment paper, a serving platter and cheese spreaders or butter knives for serving
Time:  Active time 6 minutes; Cook: 13 minutes, brie in about 15 minutes

Ingredients:

  • 8-ounce wheel of brie
  • ¼ cup chopped pecans
  • 2 teaspoon butter
  • 2 slices of crumbled bacon
  • 2 ounces of dried apricots
  • ¼ cup apricot preserves
  • Slices of baguette or crackers

  1. Measure everything and set aside. Roughly chop the apricots
  2. Cut a square of parchment that is 11”x11”. Preheat the oven to 350˚. Place the parchment paper on the baking sheet. Place the brie wheel in the center of the parchment paper. Place in the oven for 8 minutes.
  3. While the brie is baking, melt the butter in the skillet over medium. Add the chopped pecans and toast until just golden. This should take about 1-2 minutes. Stir the whole time. Add in the bacon, stir and remove from the heat.
  4. After the brie has baked for 8 minutes, sprinkle the chopped bacon, pecans and apricots on the cheese and return it to the oven for another 3 minutes.
  5. While the brie is finishing, warm the preserves in the microwave safe dish until easy to pour. I microwaved mine for 1 minute on 50% power. Microwave at 15 second intervals after that until it is the proper consistency.
  6. The cheese is very soft now, so be gentle. Carefully, using the parchment paper, slide the brie onto the serving platter. Use the silicone spatula to scoop up any wayward toppings and return them. Pour the warmed preserves over the brie and serve right away. Offer your guests slices of baguette or crackers.

Parmesan Rosemary Almonds


Parmesan Rosemary Almonds are another quick, last minute snack. If you have a nice jar, these also make a nice hostess gift for any parties you might attend. If you are making the nuts into a hostess gift, add a sprig of fresh rosemary to the jar as a decoration.

Parmesan Rosemary Almonds
Servings: 10 ounces of almonds
Hardware: 2 baking sheets, parchment paper or a silicone baking mat, a silicone spatula, a microwave safe mixing bowl, measuring spoons and cups, an airtight container, paper towels
Time:  Active time 6 minutes; Cook: 5-7 minutes, nuts in about ½ hour

Ingredients:

  • 10 ounces of whole almonds
  • 2 teaspoons butter
  • 1 tablespoon + 1 teaspoon dried rosemary
  • 1 teaspoon large granule salt (maybe more)
  • ½ cup grated Parmesan cheese

  1.  Melt the butter in the microwave safe mixing bowl. Toss the nuts and the tablespoon of rosemary until coated.
  2. Cover one of the baking sheets in parchment paper or the baking mat. Line the other in 3 layers of paper towels.
  3. Spread the nuts out in a single layer on the sheet lined with parchment and place in the oven. After 5 minutes, stir so that the outer nuts are moved to the center and the inner nuts are moved out. Return them to the oven but monitor them closely. As soon as most of the nuts are browned, remove them and spread them out in a single layer on the paper towel lined sheet. Immediately, sprinkle on the salt and remaining rosemary.
  4. Allow the nuts to cool for about 20 minutes. Place them and the cheese in the air tight container and shake like crazy to coat. Taste and adjust the salt. Serve at room temperature.

Saturday, December 23, 2017

Cheese and Bacon Crackers


Cheese and Bacon Crackers
I have wanted to make cheese crackers for a while. I am on a two-week break from my other life (high school teacher,) so if not now, then when? As usual, I read a ton-I weighed them-of recipes. The basic recipe is cheese, butter and flour. From there, the recipes diverge. I saw recipes calling for other varieties of cheese, even cream cheese. After this maiden voyage, I am going to tweak this recipe and try other cheeses. Doesn’t pepper jack sound intriguing? Other recipes used different herbs like garlic, dried chives, dill and oregano.

I decided to go spicy and bacony, because who doesn’t like bacon? I used ½ teaspoon each cayenne and black pepper. Next time I may substitute the cayenne for pepper flakes. I used the bacon pieces that are sold in the salad dressing aisle with croutons. The bacon pieces are much more convenient than frying all that bacon yourself. The pieces are also less greasy. I added onion flakes for a different texture and a more complex flavor. If you love this recipe, try Bacon Jalapeno Popper Cheese Straws from our friends at Food Flippers.


Servings:  3 dozen crackers
Time: Active time: 20 minutes; Cook: 15 minutes; Refrigerate: 30 minutes-crackers in an hour
Hardware:  Measuring cups and spoons, a large mixing bowl, a rubber spatula, a mixer, a baking sheet, parchment paper, plastic wrap, a knife and cutting board, a cooling rack, (optional) a silpat

Ingredients:
  • 2 cups shredded cheddar cheese
  • 1 stick room temperature butter
  • ⅓ cup crumbled bacon
  • 1 tablespoon dried onion flakes
  • 1 teaspoon salt
  • ½ teaspoon cayenne pepper
  • ½ teaspoon black pepper
  • 1½ cups flour
  • 3 tablespoons ice cold water
 1.      Make sure the butter is soft. Mix the butter and cheese together for about three minutes on high. The dough will get stuck in the beaters. Stop occasionally and use the spatula to remove the batter and return it to the bowl. Add a tablespoon of very cold water and mix for another minute.
2.      Add the bacon, onion flakes, salt, and peppers and mix on medium until all the bacon is evenly distributed.
3.      Add ½ cup of flour and another tablespoon of cold water. Mix on medium for 1 minute. Add another ½ cup flour and the final tablespoon of water. Mix for a minute. Add the last of the flour and mix until a dough forms.
4.      Turn the dough out onto a large piece of parchment paper and shape it into a 1½ inch in diameter log. Roll the parchment paper around the log. Then wrap in plastic wrap and twist the ends to seal. Refrigerate for at least 30 minutes.
5.      Preheat the oven to 375˚. Line the baking sheet with parchment paper or a silpat.
6.      Unwrap the dough and cut the log into ¼ inch slices. Place the crackers about ¼ inch apart on the lined baking sheet.
7.      Bake for 15 minutes. Transfer the crackers to the rack and cool completely. Serve at room temperature.
8.      The crackers will keep for about a week in an airtight container. The dough can be kept wrapped in the fridge for a week before using, just make sure it is wrapped tight.